Pages

Wednesday, 9 December 2015

Fresh floral Jewelry

Hello folks...

its been ages since i blogged. Today i have something interesting and different from cards and paper craft. Yes, its my first try with fresh floral jewelry. I designed and laboured over it for a whole night. Here are the pics first,


Ok as you see the various floral ornaments i made are
Necklace, 
Hip chain, 
Bangles, 
Vangi (upper arm), 
Nethi Chutti (forehead chain), 
Earrings, 
Hair accessories 


The main flower ingredient is Nandhiyavattai (tamil), Moonbeam or wax flower in english and Chandni in Hindi. I also used Rose petals, few beads and golden lace along with it. 


The flowers look like jasmine because they were harvested as small buds. This adds to the beauty and sturdiness. First i made a lot of strings with the white flower and then put the parts together. It was time consuming and fun and interesting too.


The Dollars/pendants took the most time. First i started with the golden cloth and threaded it to make it look like a flower, then layered it with white flower, rose petals, golden bead and finally a red one. I loved it. Dint know my first experience would turn out satisfactory. My favourite though were the earrings, i bought a plain hoop earring and threaded the flowers directly to it. It suited my lil gal very much.


Thanks for dropping in my blog, hope u liked it. Do drop your comments and experience on fresh flower jewelry. Any tips and techniques are also welcome.

Hoping to blog more. It clears my mind and gives a lil peace time.

Bye bye
Sujana 

Tuesday, 14 July 2015

1st bday Invites

Hello all

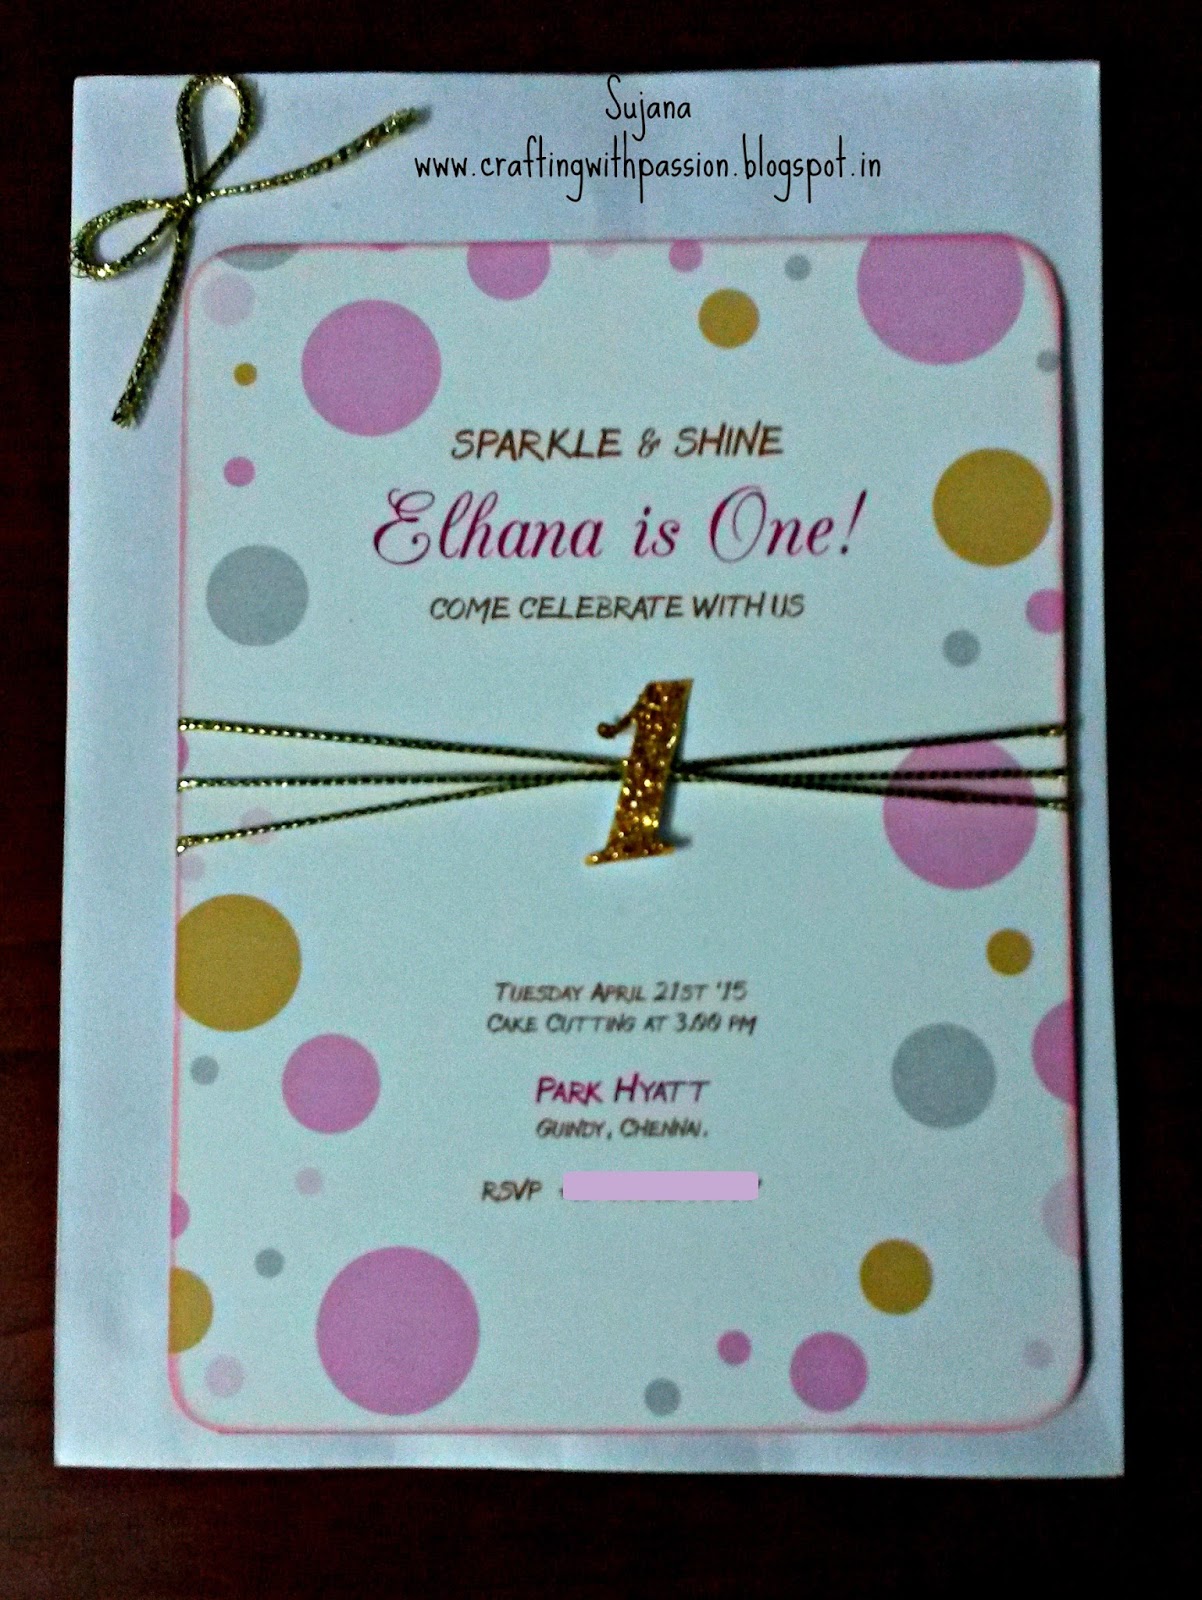
Happy to post again, hoping to make it a habit again. So today are some 1st bday invites made to order recently. Here are the pics first


Its a pretty simple and easy to do one. But i liked the concept a lot. The number '1' is handcut. I dint have a die for numbers so i cut it by hand and glittered it myself. It is quiet easy to glitter with local glitters. Fevicol in one plate and glitter on another plate. Actually i dint have time to buy glittered sheets, it was a last minute one, so i went in for handcut and self glittered 1s. Though this saves you a lot.


First rounded and distressed the edges, then the golden thread was tied three times around the card and arranged neatly, then stuck the '1' on top of it.


I liked this concept a lot that i tried it for my son's bday too, with spiderman theme. Coming soon in the next post. Hope you liked it today. Thanks for dropping by.

Tuesday, 7 July 2015

Mangalyaan Model

Hi everybody,

a big hello to all. I know i have been missing from blogland for more than 3 months. April and May we had summer camp for kids where we did LOTS of projects. But for now am going to share one of my favorites. My daughter had a 'Speech with Property' competition last year and the property we chose was 'Mangalyaan'. And here is the model i did.


Front view- Mangalyaan


Mangalyaan model


Top view-Mangalyaan


The model is based on the numerous photographs available and i have tried to replicate as much as possible. The blue squares are the solar panels. The central cube is designed to show the payloads and the propellant tank. And the large circle is the antenna. 

I started off by making the central cube which is very much similar to an explosion box. I kept adding other elements by trial and error. A lot of recycled stuff like an empty pen without refill, half a gems box, box lid, etc has been used. 

Saturday, 28 February 2015

Car themed Invite-Pop up Slider card

Hello sweet friends

Here is an old project to share. I made this nearly an year back for my sister's son 2nd bday. He is going to be 3 soon. It is a pop up card. All the elements are hand cut. 


The black and white checks are stamped repeatedly to give this look. Just loved the matching ribbon. My cousin got me this and i had been hoarding it for a long time.


Card lying flat

The little puffs of smoke are also handcut. All in all its an interactive CAS card ;) I soo wanted to add the traffic lights on the left upper corner.But due to time constraint it cudnt be done :(


The pop up


I also made a name banner in the car shape. The name reads "Hridhay". Further for his bday i made a car shaped wish book which i had already blogged, here is the link to it. This wish book is one of my all time fave.


Car shaped name banner

Thanks a lot for dropping by today to visit me. Each one of ur visits encourages me and motivates me. Thanks for all the support and kind words
Have a great weekend

Sujana

Sunday, 22 February 2015

Baby Boy Gift Envelop

Hello people

Here is a quick post from me today. I made this Money Envelop for a friend's baby. It was put together pretty quickly but i loved the effect it had. Usually we gift money when we dont know what wud be the right gift for the recipient. But gifting money in a personalised manner does add interest.


The sentiment is stamped and fussy cut and the stars are paper pierced from a pp. I simply love banners. U can say i am a banner addict. To me a project is incomplete without a banner. 
Other embellishments are white lace, washi tapes and a wooden 'baby'. The base is fabriano card stock

It is my first try at envelop making. I loved it and hoping to make many more.
Thanks for dropping by to visit my blog. Your words are my encouragement and inspiration. Thanks everyone.

Sujana

Tuesday, 17 February 2015

All Pinky 'Card in a Box'

Hello there crafters....

Hope everyone out there are busy as bees. Ok today s post is a Card in a Box. It was for a lil girl and so i added lots of pink in it. Girls and Pink.... it was always a great combo but now a days girls once into the teens want to distance themselves from "Pink" cos i guess pink screams cute cuddly and a baby all over. This is because i got a couple of requests for 15 16 year old girls asking kindly avoid pink :)
Here is my all pinky card for a 9 yr old :) Have a look


Front View


Side View

The popping elements i have added here are few but take a look at the 3d banner i have added. Do u know how i created it? I took a curvy strip of transparent sheet and stuck the lil triangles to it, then added lil bows at the end. Then to this set up i added tooth picks to act as poles. You might get a look at the tooth picks in the first pic and the next one. Simply loved it, i should have taken a individual pic of it i guess


The popping elements

I have paper pierced the tatty bear from a PP and added 3d elements to it, Lil glittery stars and bday hats. And to the back side i have added another sentiment and left some space for personal message.


The back view

And finally i made a coordinating box cover for it, all pinky again ;)


The box cover

That is all for today, hope u enjoyed it. Thanks for stopping by.
Have a great day

Sujana

Linking it to

Cosmic colours # 10


Sunday, 8 February 2015

Classic Colours- Black & Maroon

Well well well.... keeping up with posting regularly on blog.  Its been a long time since i had posted any Explosion boxes, so here is one. And it is in the beautiful colours of black and maroon.


I have worked with the ribbons to give it a pleated look, used my glue gun for this. It requires a lotta patience but in the end it is totally worth it.  Have a look, i have given the same pleated finish on the inside for the tag pockets too.


Surprise box inside


Top view when u open the surprise box

I always love putting a lil surprise inside my boxes and this one is a perfect surprise with flowers and wishes. Below pic shows a closer look. "Happy 1st Anniversary"


Thanks for stopping by today. Hope u enjoyed it.
Linking it to 
Craft your passion # 247- anything goes
Kraftzone #12 season of love

You might also like