Pages

Showing posts with label Stencils. Show all posts

Tuesday, 7 February 2017

Gesso BG + Digi Image

Hello there...

February is truly romantic in the blogland with reds & pinks. Loving the ideas everyone come up with. But i am truly in a different mode. Trying out new stuff and new techniques. Some particular idea hits you and u can never come out of it until satisfied.
So this time around it is Digital image & watercolours for me. When my limited supply of image stamps ran out, i have started trying watercolouring and pencil colouring on Digi images.

Ok here is my humble take on colouring Digi images. I have had many challenges. The main being "smearing & bleeding of printer ink". I still havnt overcome it, trying different methods. Hope something works out soon

Water coloured Digi Image

I have coloured the image with watercolour pencils. You can see the difference in the face... skin tones are the most sensitive to bleeding. It was just a trial at watercolouring but i cudnt waste the pic... so made it into a card.

BG
For the bg, i first applied gesso thru Hero Arts chevron stencil and let it air dry. I wanted to make a watercolour washed bg but Distress inks get too diluted and hence the light bg. Gesso resisted the DI and thus a beautiful bg.


Gesso+Stencil in BG

Finally mounted the image on the bg and accessorized it with pearls & ribbon. Sentiment stamped with versamark onyx ink. It really stamped well on gesso too.

So thats it today. Hope you liked it. Do comment on tips to avoid ink bleeding. Thank you

Hugs
Sujana

Submitting it to 

Saturday, 28 January 2017

My first Mixed Media Layout

Hello lovely ladies,

I am soo excited to share my first mixed media layout. This pic was taken during my son's first tonsure ceremony. Lots of celebration and one of my fav pic.
I really enjoyed playing with different mediums and am now very keen on collecting more sprays & pastes 😀😀😀 A crafters' heart will always want more right?

The pics first as always, 


The Layout


The Background
I started my layout on a piece of foam board measuring 8 x 6 inches. I dint have a canvas board. I layered the base with a coat of gesso... surely gesso gives the needed texture. Then directly on the gesso(after drying ofcourse) i started sponging peeled paint and worn lipstick Distress inks. 
Once satisfied, i stamped the bg with a script stamp with Hero arts shadow ink (green colour). Wanting to add to the bg, I choose a stencil that i once picked up from my local stationery shop and added gesso through it.
I guess any textured/modelling paste would have given more volume but for more gesso did fine for me.
I wanted to add my fav honey comb design but i only had Tim Holtz stencil, so i decided to use it as a stamp, i applied mild DI on it and pressed it to my bg, And now i used this as an outline and drew on it with an Emboss It pen and heat embossed it gold
Still not satisfied i splashed some black and gold paint on the bg. And now i was satisfied.
The photo which was by the side also got some paint splashes by mistake but it looked gorgeous to me, so i just left it as it is.😃

Close up of the BG

The bg was the scariest part. Having been done with it, I arranged and rearranged the elements to my safisfaction. The flowers are stamped on Papericious Sigma cardstock and coloured with Distress inks. Loved the beautiful smooth cardstock. Perfect one.


The flowers

I also added some papericious green square sequins. By mistake a sequin fell off wen it was half dry and i found that it made a gorgeous texture with the fevicol. So i scrapped off a few more sequins to reveal nice texture. 


The bird is paper pierced from a DCWV Mariposa stack. Everything else is mostly from my stash and scrap. Beads, diecuts, corrugated wrap sheet, gold thread, lace, charms and pp.
Popped the flowers with foam dots


Another close up

ok thats it. So did you like it. Any ideas or tips for this novice at mixed media?
Thanks for dropping by today and do share ur comments.
Hugs
Sujana

Entering it for
Papericious- Make it 3D
SSS Wed Challenge # ATG
Allsorts Challenge #400 lets celebrate


Thursday, 29 December 2016

Distress ink Mosaic Cards

Hi friends

As the year end closes in, trying to update the various projects i missed out. The following cards were part of the Teacher's day series. Mosaic cards are easy to mass produce. 

Here the butterfly is coated with glossy accents.


 Also i made few mini cards. Used some bakers twine for the front panel and the sentiment is heat embossed.


Love the look of it. Simple & effective. 
Thats it for today. Thanks for dropping by.

hugs
Sujana

playing along with
1. C.R.A.F.T challenge #396 - ATG

2. Avenue 613 # 192- ATG

3. Alphabet challenge - use something RED

Friday, 9 December 2016

You rule my World!

Hi all,

so happy to share a dear card of mine. I loved making it. Here is the card


Yeah, the castle stamp- its gorgeous and am loving it. Its been sleeping too long and am glad it has finally seen the light of the day. And also TH honey comb is my fav now, love it. 

For the card, first i went about and stencilled the pattern with yellow, orange & red DI. Then stamped the image on a separate watercolour sheet and heat embossed it in gold before fussy cutting it.

I wanted to add more interest to the card and hence splashed some black ink with a brush and added sequins to the bg. And now before adhering the castle, added some silver twine behind it for more added interest 


Close up of the bg

The sentiment is from Peekaboo and i loved the mix up possibilities in this set. The sentiment is Heat embossed in black on vellum. May be i should try another card without the vellum and stamping the sentiment directly on the bg. what do u say gals??


Another view

To check out my other castle card, click here. Do drop in ur views and comments.
Thanks for dropping by!!

hugs
Sujana

Linking it to


Friday, 23 September 2016

Pink & Gold

Hello there,

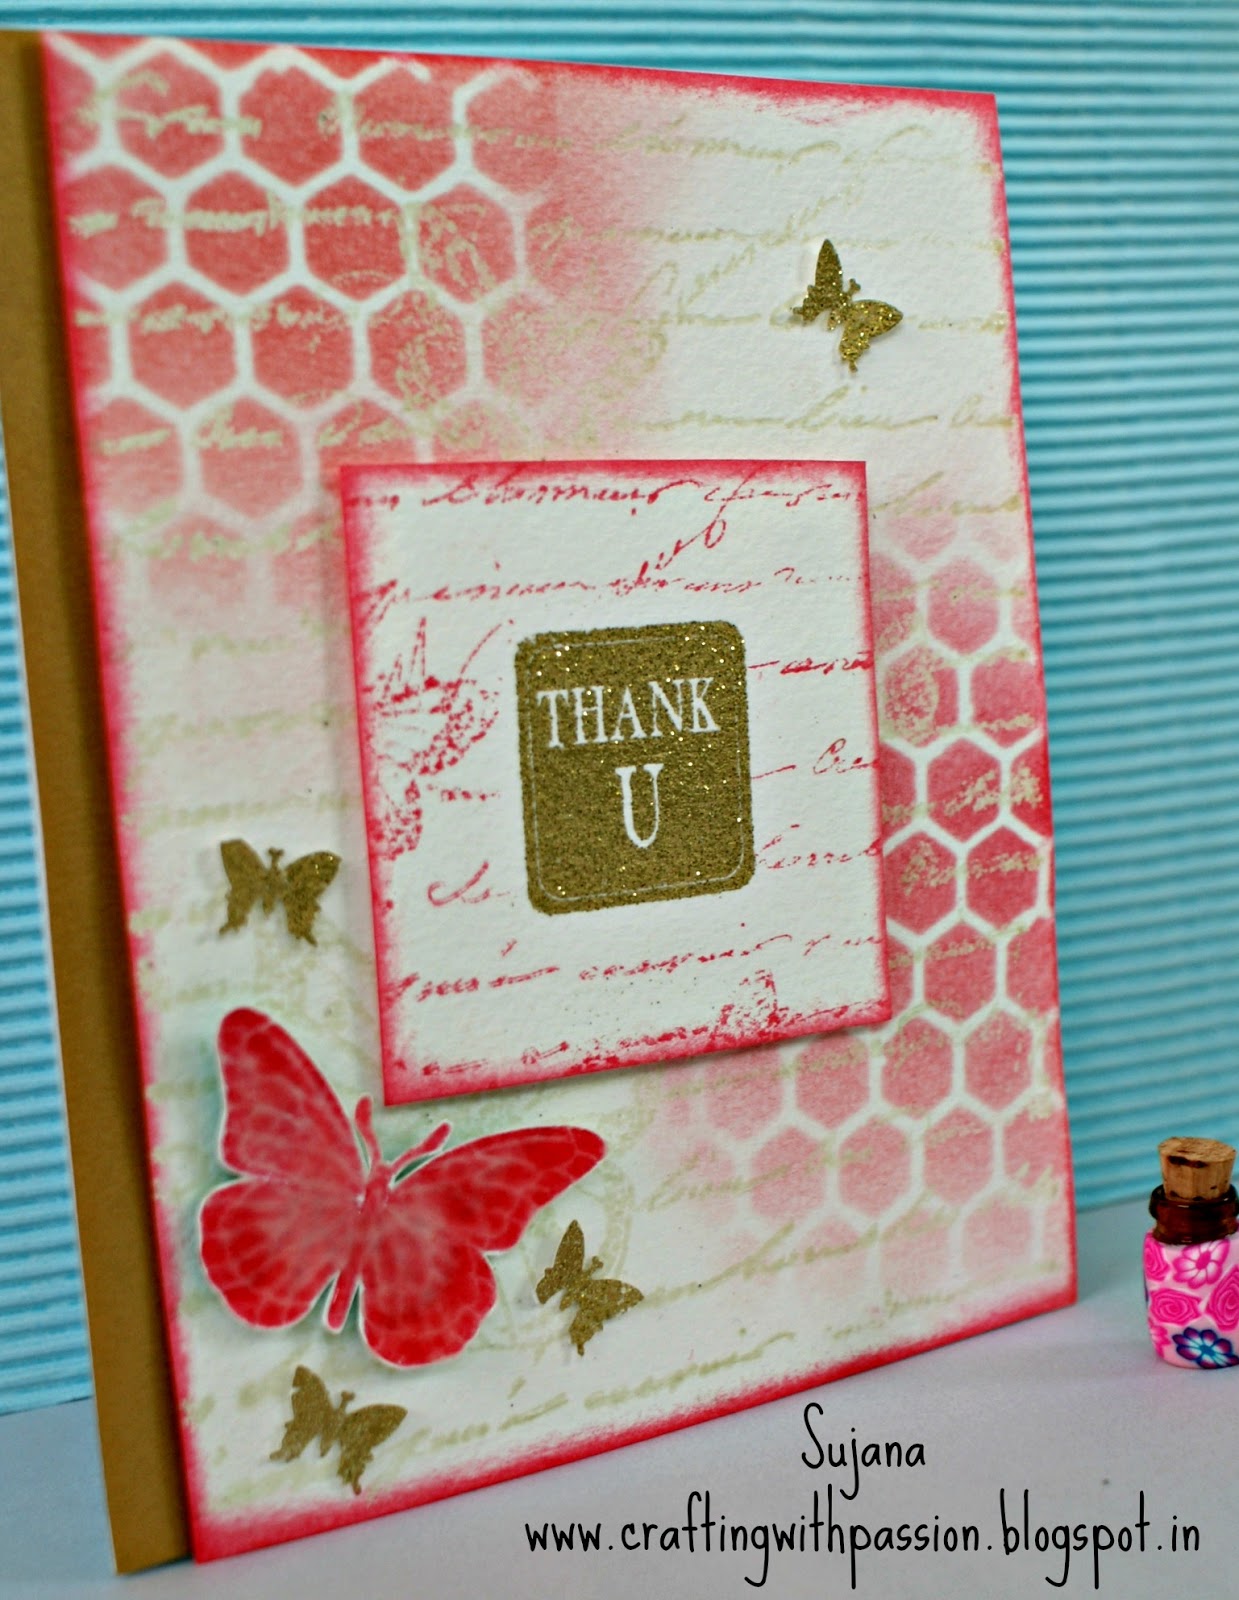
Keeping this blog alive amidst busy days. I made this card for Teacher's Day for my daughter. Here too i have tried few stuff new to me.... Stenciling & Embossing


First i clear embossed the piece of card stock with script stamp and then i have stenciled randomly with TH honey comb stencil in worn lipstick. I also inked the edges with the same. The centre panel has the same script stamp stamped with Worn lipstick. The sentiment is heat embossed in gold. 

And see those gorgeous butterflies. I stamped and fussy cut the butterfly and gave it a thick coat of glossy accents. And it sure looks Glassy :) The smaller butterflies are punched and embossed in gold. 

Finally mounted it on card base with a golden strip. So how is my card? I enjoyed making it...... with lots of trial & error. See you with another card soon. 

Happy weekend!!!

Monday, 12 September 2016

More Chevron!!!

Hey crafty folks,

Here is one more experimental card from me. For some time now i have been wanting to give mixed media a try, but dint have the guts to do so. I got this Pebeo White gesso a while back and here is my first try with it.


I took a white cardstock and applied the Pebeo Studio Gesso through the Chevron Stencil. I used the scrapper which came along with my cameo. It was pretty good and did the job.


I allowed it to dry naturally (should have used the heat gun) and then distressed the CS with spiced marmalade and worn lipstick. The result was good but a little boring so i cut up the CS in the centre along the zig zag. And against a black CS it was striking.
Just wanted to focus on the bg and sentiment so kept it simple and neat. Stamped the sentiment on vellum and heat embossed it in black. And a little golden embroidery floss to add interest.


Thanks for dropping by and have a great week ahead

Sujana

Playing along with


Wednesday, 31 August 2016

Castle Shaker Card

Hello hello

Am going crazy with stencils, DI and Embossing.
Sharing a quick card here. I made this card for my friend for their "house warming" ceremony. A look at the card first. 


Shaker Card

I first made the bg with TH stencil (i love it) DI (Peeled paint & tumbled glass). I showered some gold embossing powder on the wet DI, tapped the excess and Heat dried it. So the whole bg is kinda glittery, here its not seen though.

Then for the shaker element i had this stamp set from Pebbles (i got it from Ujjwal long back), which had this cute castle. Since the card was for the house warming it was appropriate. Clear embossed the castle and again inked the bg with the same DI.

Then i misted the bg with water from toothbrush bristles. Hence the slight blotchy effect. I would have loved some more water, but all this is new experiments for me. Filled the shaker with star confetti and gold mini beads.

Finished off the card with gold embossed flowers and bakers twine.


Can you make out anything from the photography? The Fuchsia flower? 

yup, the house warming was in Kodaikanal and hence the beautiful bg for photography. 

So did u like it? thanks for dropping by. Linking it to Lulupu #64 Friendship with a twist

Ranganjali # Aug Challenge (My fav technique is embossing & also shaker cards)

Monday, 22 August 2016

Chevron Rainbow card

Hi people

Here is a card i love for many reasons, one of them being able to use some of the new crafty stuff i got hold of. I have used Hero Arts Chevron stencil here and i love it. i always love chevrons.

Another reason i love this card is i think the heat embossing has finally come out soo well. I have clear embossed the chevrons and also heat embossed the sentiment in black on vellum. Thanks to some "Goodbye Static", the heat embossing on vellum seemed perfect. love it.


Also i have never used distress inks as my focal point in a card. Took a bit courage to try it. Do tell me how the card has come out friends. To finish off the card, i used some star confetti i had as blings. Stuck the stars with glossy accents.


After a long time i have made this card just for the sake of it, loved trying some new technique. This is the first time am using a stencil. Below pic shows the gloss wen it catches the light.


Thank you dear crafters for all the new techniques and inspirations through your blogs. Thanks for dropping by, see you soon again.

Linking it to,


(I have used 4 colours from the board)

You might also like