Pages

Monday, 25 July 2016

YOU & ME Layout

Happy Monday all!!

Happy to share a LO today,


YOU & ME Layout


I loved this PP from prima and exclusively did this LO for the sake of the PP. Love it to bits. The only tedious work was to fussy cut the wordings. The wordings were actually from an previous gift my husband gave me. Gave a new feel to those. 

I started out with the photo placement and the wordings. Rest fell into place easily. The butterflies u see near the cycle is paper pierced from another pp. 

Charms, MDF, washi, heart blings, heart paper clip, twine and some distressing/stamping and finally am done.


Close up view


Hope u liked it. Thanks for stopping by today.
Have a great week ahead

Sujana

Thursday, 21 July 2016

Back to Explosion Box - Black & Red

Hello folks,

Good to be back to blogging. Today's post is an explosion box. With the pics first


The Box


Top View

Usually my style is to jus go with 2 contrast colours, this time i tried using beautiful pp and mix matched them. I am not perfect with heat embossing so i tried it in this project. Infact used a lotta heat embossing.
You see the butterfly... lets take a closer look,


It is a paper pierced Butterfly from the same pp. I drew Small lines with Emboss It pen and heat embossed it with gold Glitter Wow powder. Then finally added glossy accent for the finish. Loved doing it. My own lil embellishment


Open View

Shaker element on Box lid


Gift Box Centre

This box was for a wedding, For a watch to be kept in the centre as a gift. So i used all golden yellow where ever possible to make it grand. The red card stock base is fully stamped with script stamp in shadow ink.(Visible in the nxt couple of pics) Usually photographs cover the bulk of panels, but here i worked on all panels.


Second Layer


Close up View


All Sentiments are Gold embossed. Finally got the hang of it. I cudnt stop myself from heat embossing everything. See the bird cage and the butterflies in it. I punched a couple of butterflies from back card stock, drew designs with Emboss It pen and heat embossed with gold. 

So that's it. Hope u enjoyed taking a look here. I positively enjoyed heat embossing. 
Thanks for stopping by,

Sujana


Playing along with 

Papericious
I was inspired by all the gold and glitter in the moodboard, also the flowers, diecut and the tiny beads which i have used in the shaker element.


(I have Chosen A- Black, B - Red, C-Golden Yellow)

Tuesday, 12 July 2016

Thanks Coach!!

Hi there again

Today my post is a swing card, i love interactive cards, and this one is pretty easy to make. First lets have a look at the card,

Swing card - Front view


Sorry for the bad pics. It was a last minute card for our coach and i dint have much time to click a decent pic. So my hubby did the honours. 
If u remember, both the Pair of skates and the Figure skater are Cameo cut and it was my first cut. Also the sentiment ' Thanks Coach" and the border is cameo cut.


Inside- front view


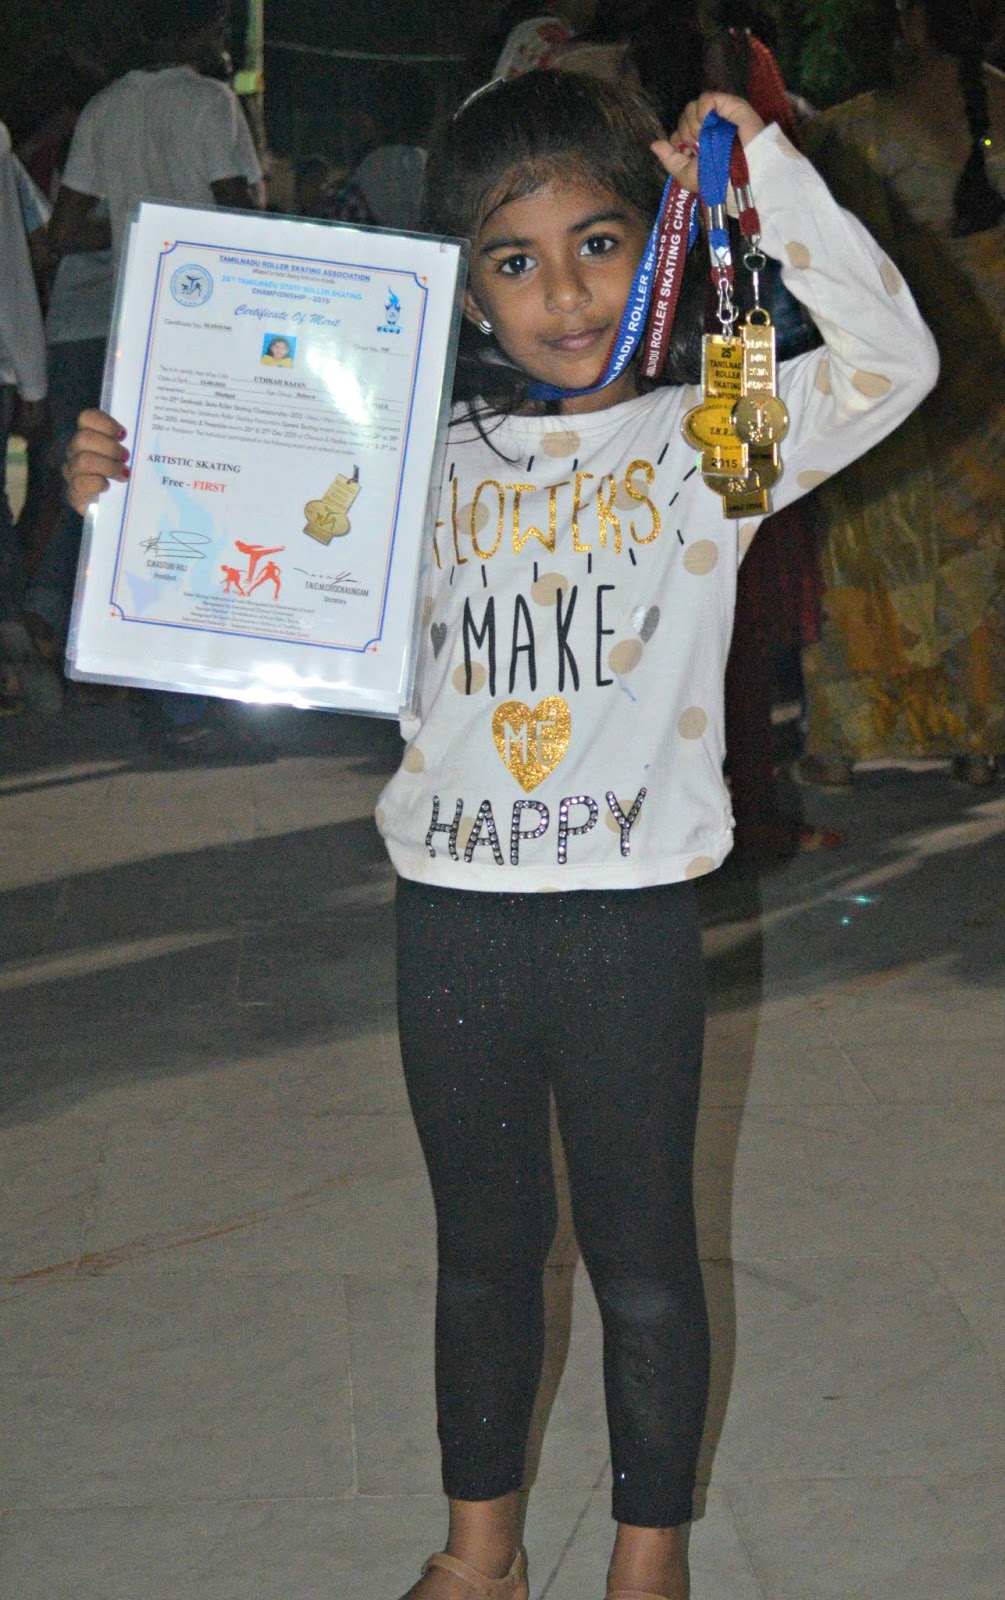
As i said, this was for our Skating Coach Mr. Pavan. Only because of his coaching and support did my daughter Uthrah win laurels at state championship. Here are a couple of he snaps.


Thanks for dropping in today. Have a happy crafty week. Bye bye

Sujana


Monday, 11 July 2016

Love you...

Hello folks,

I haven't been around here for more than 3 months. Crafting always but no time to post. Ok no stories, straight to the card. Creating a simple card is always a tough job for me. scrapbooks, explosion boxes and interactive cards are ok for me but simple one layer cards... nope!!!

Check out the card and gimme your comments gals


What started out as a simple one layer card, ended up as a shaker card. 
Am never that good at heat embossing, so finally ordered Goodbye Static!! Lets c, hope my next project with heat embossing turns out good.

For the shaker elements, i added tiny star confetti, and also stuck few stars as bling.


The card looks a lil better IRL. Hoping to brush up on a few new card making skills soon.
See you soon again (hopefully)

Sujana

Saturday, 12 March 2016

A Vintage photo frame!!

Hello dear crafters,

This is my first post for march i guess. A bit lazy out there. Anyway on to my project,


Vintage style LO

I simply loved the outcome of this project. It was done in a wink, all that matters is the right placement and some lovely embellishments. Am not the kind of crafter who has a particular vision and does exactly like that. My outcome is different from what i started 100% of the time. 

As you can see, the base pattern paper is recycled from various bits of left over papers, it gives a patched up feel. The words "dear grandfather" is cameo cut. 

I always have extra TH tattered florals is white cs, so that wen ever i need it, i just distress it to the exact colours. So here i have a pop of yellow matching to the lil girls' dress. 


To finish it off, glittered the flowers mildly and added a wooden button. Dont u love all those metal charms. They just make me soo happy. 

Thanks for dropping by, do comment on ur fav style of crafting. Do check out my sidebar for Dr. Sonia's awesome Giveaway!!! Watte talented lady

Also am gonna link up to few challenges after a long while. 


I have chosen C2 - Flower, PP, Button, Glitter(on flower)


Indian Craft RoomICRCSPR01


Monday, 22 February 2016

Frozen themed Birthday Invites!!

Hello lovely ladies...

With my lil guy's birthday approaching, i realised that i haven't yet posted my daughter's last year bday invite. It was a Frozen themed birthday party and loads of handmade items we had. Today ill first post the invites i made. 


I made quite a handful of different models. Every card is a shaker card though. I had saved this gorgeous snowflake pp and it was perfect for these invites. The shaker part was the tedious one but still enjoyed every bit.


For the shaker fillings, i used very small beads, blue and silver of course. And the snowflakes are die cut. I won these dies once from Itsy Bitsy. 


This 4th model is the first one i actually made, I wanted to create something like a scene, which dint turn out like i imagined ;)


Thanks for dropping by, do share ur comments. In the next post ill share other stuff i made for the bday party. 
Have a great week ahead. 

Playing along few challenges after a very long time

Thursday, 18 February 2016

Valentine day card #2

Hello again friends,

Here is the second card i tried this Valentines'. My favourite one!!1I almost had a different idea for this but ended up with a completely different one(it happens a lot with me ;)) I am not much foresighted i guess. 


 Its been a while since i played distress inks in my cards. Mostly i use DI only in the corners of my scrapbook pages. So loved this card wen i got to do more with DI. It all started with the grass, then tried with the negative of the clouds, and finally for the sentiment. Am just a novice with DI colouring


Do give ur ideas of how u would have done this card. Would you have added anything more to build this card or done anything differently. Do share ut views, i would love to improve with DIs.
Thanks a lot for dropping by
Sujana

You might also like