guess wat... am back to explosion box 😉
I made this for my friend's new born daughter and loved how it turned out. In fact i have made my first craft video with this. Do check out the video link at the end of the post.
Here are the pics, (its picture heavy)
Loaded Box top
I have made my box top with a ceramic doll at the centre and surrounded by cute miniatures. The name is Silhouette cut and has a coat of glossy accents. Beads, lace, chipboard, etc
Close up of the ceramic doll
The flower is handmade with Tim Holtz tattered florals. I have heat embossed some white glitter on the flower. The white lace is glued with a glue gun. Also on the outside i have used fleur de lis squares as frames and chipboard elements. Chipboards are from Papericious & Itsy Bitsy.
handmade rose embellishment
At the centre is a handmade pram which can be used to hold chocolates and favours. The scallop hearts are thin cut dies from Itsy Bitsy.
Full reveal
Its a 3 layer explosion box with out layer panel measuring 4*4 inch, middle layer- 4*3.5 inch and inner layer - 4*3 inch
baby pram @ the centre
Back view
The panels have pockets, waterfall element, photo mats, etc. Here are some of the panels.
Inside panels
page panels
That's it folks. Hope u enjoyed it. Dont foeget to check out the video below. Do share ur views on my first craft video.
Good to be back to blogging. Today's post is an explosion box. With the pics first
The Box
Top View
Usually my style is to jus go with 2 contrast colours, this time i tried using beautiful pp and mix matched them. I am not perfect with heat embossing so i tried it in this project. Infact used a lotta heat embossing.
You see the butterfly... lets take a closer look,
It is a paper pierced Butterfly from the same pp. I drew Small lines with Emboss It pen and heat embossed it with gold Glitter Wow powder. Then finally added glossy accent for the finish. Loved doing it. My own lil embellishment
Open View
Shaker element on Box lid
Gift Box Centre
This box was for a wedding, For a watch to be kept in the centre as a gift. So i used all golden yellow where ever possible to make it grand. The red card stock base is fully stamped with script stamp in shadow ink.(Visible in the nxt couple of pics) Usually photographs cover the bulk of panels, but here i worked on all panels.
Second Layer
Close up View
All Sentiments are Gold embossed. Finally got the hang of it. I cudnt stop myself from heat embossing everything. See the bird cage and the butterflies in it. I punched a couple of butterflies from back card stock, drew designs with Emboss It pen and heat embossed with gold.
So that's it. Hope u enjoyed taking a look here. I positively enjoyed heat embossing.
Thanks for stopping by,
Sujana
Playing along with
Papericious I was inspired by all the gold and glitter in the moodboard, also the flowers, diecut and the tiny beads which i have used in the shaker element.
Well well well.... keeping up with posting regularly on blog. Its been a long time since i had posted any Explosion boxes, so here is one. And it is in the beautiful colours of black and maroon.
I have worked with the ribbons to give it a pleated look, used my glue gun for this. It requires a lotta patience but in the end it is totally worth it. Have a look, i have given the same pleated finish on the inside for the tag pockets too.
Surprise box inside
Top view when u open the surprise box
I always love putting a lil surprise inside my boxes and this one is a perfect surprise with flowers and wishes. Below pic shows a closer look. "Happy 1st Anniversary"
First thanks a lot for taking part in my blog candy. I had fun!!!
Ok now onto my project, it an explosion box again but this time i have tried a bird cage in the centre. Look at it and do give me your views and suggestions.
I really loved how the bird cage turned out. It was pretty much a trial and error at start but was satisfied at the first go itself. Fitting the birds, branch and leaves inside after assembling the cage was a little tough but i had fun through and through. Loved the pearls inside too... my daughter kept asking is it eggs mom? hahaha
And here the 'special moment' is an MDF. Since i had burnt my heat tool i painted with a mixture of white acrylic and fevicryl glitter to give it some shimmer. The corrugated flowers are TH tattered florals.
Thats it for now. Hope u liked it. Thanks for dropping by.
This time i got a different request for an explosion box for a friend who is crazy about books. And here is what i came up with.
I had a couple of ideas for the centre but this is what i liked the best- a stack of books with a cup of coffee on it. looks good right? For the books i used the styrofoam that comes as a packing material- it was white, layered, holded firm and perfect for this. The cup is a 3D quilled one.
The layout
Loved the colour combo too, both bold colours. Coordinating colours for each panel is what takes a long time. Once the base work is done, then u finish it in a jiffy.
Another View
Below is the some of the different panels. The centre pic has too bookmarks. Since it was book themed, i decided to go with a couple of bookmarks. The first one is actually a magnetic bookmark and the second is a book corner. So basically a gift inside a gift :)
So how do u think this is people. I sure had fun doing something different.
And thanks for stopping by my blog. Dont forget to enter ur names for the giveaway. Its open till sep 10th. Try ur luck.
Lessology - # 39 Fluttering Butterflies (2 butterflies on a panel, recycled styrofoam for books and old invite for box top)
Delightful Challenges - School Daze (book stack, book worm, bookmarks)
Try it on Tuesday Use ur Stash (recycled Styrofoam for the books)
Seize the Birthday - ATG
Wondering at the title?? yeah its just an explosion box with the theme as 'Happiness'. But it has an explosion of handmade flowers... hav a look at the pics
The top with handmade roses
The centre has a box to hold a mini cd
The second layer
Few of the panels
Okay these are some of the things done differently. First this box can hold around 30-35 photos and space for 30 wishes or records. All these i hav accommodated through accordion folds and other interactive methods. There are 3 pockets which hold 5 tags each. Further though there are jus 2 layers i hav decorated the back panels of the first layer and so it leaves me with 12 panels and hence space to accommodate a lotta stuff.
Thats it folks. Hope u liked it and thanks a lot for stopping by.
Sujana
Today am sharing an explosion box based on graduation themed. My friend's brother was going to the US for higher education and so she wanted it based on graduation.... so here is my take on that
Graduation cap based box
I loved the colour combo of blue & black for this. The tassel is recycled from an old wedding invite. i hav nailed it down with a brad.
The explosion
Here the centre is a flower pot.... the pot is actually a 'good night' mosquito repellent bottle. Wrapped it up wid washi tape. The flowers i got it in a local market... added blue pollens and a sentiment as touch ups. I hav used 'Fleur di lis' squares for the sentiments. For the other two panels, one has a white card stock rolled up with satin ribbon to represent a degree, this is an old scrap which and a had ink marks on one side, so i hav recycled it here. And the other panel has a badge, the rossette of which was made wid scrap pp... its a very small rossette as u can see. Hope it all does justice to the graduation theme. Do share ur views crafters.
Top view
Sorry forgot to take pics of the second layer here.... 2 panels have tags for personal msg, 1 had inspiring sticker words and the other a quote 'Chase ur dreams'
Thanks for stopping by and for ur encouraging words everytime
Sujana
Entering it to
Lulupu # 24- Scrap ur scraps (scrap card stock for degree, scrap pp for badge, tassel from old invite and a mosquito repellent bottle)
This month has been very hectic.... wonder how soo many birthdays & occassions come in december. Anyway i got a lot to craft but was not able to share anything on my blog... will do it soon hopefully.
Today am sharing a Christmas box especially made for a lil girl, from her aunt and she wanted all the fantasy of Christmas incorporated in it. So here it is....
The outer view
The open view
Close up of Xmas tree
Top view
Handmade Poinsettia flower
The santa and merry christmas alone are printouts. The snowflake in the sentiment panel is a 3D one. Loved it, click on photo for more details. The santa suit shaped tag was a easy peasy one to do, this is the first time am doing a christmas themed project and i loved the variety of beautiful that one can incorporate. The 3D christmas tree also turned out quite beautiful and sticking pearls to it to indicate snow was Sunehra's idea orginally, i saw it in one of her recent posts. loved the effect.
Now the Poinsettia flowers, gorgeous right, loved it to bits. It's all due to distress ink, love how it turns a project to a thing of beauty.
Hope u liked my box, do give ur comments & suggestions friends.
And finally here is something special about the Lulupu blog hop, I thank Lulupu for the excellent line up of guest designers and their vast store which serves every crafters' needs. There is soo much inspiration there and hope u dont miss the awesome candy.....
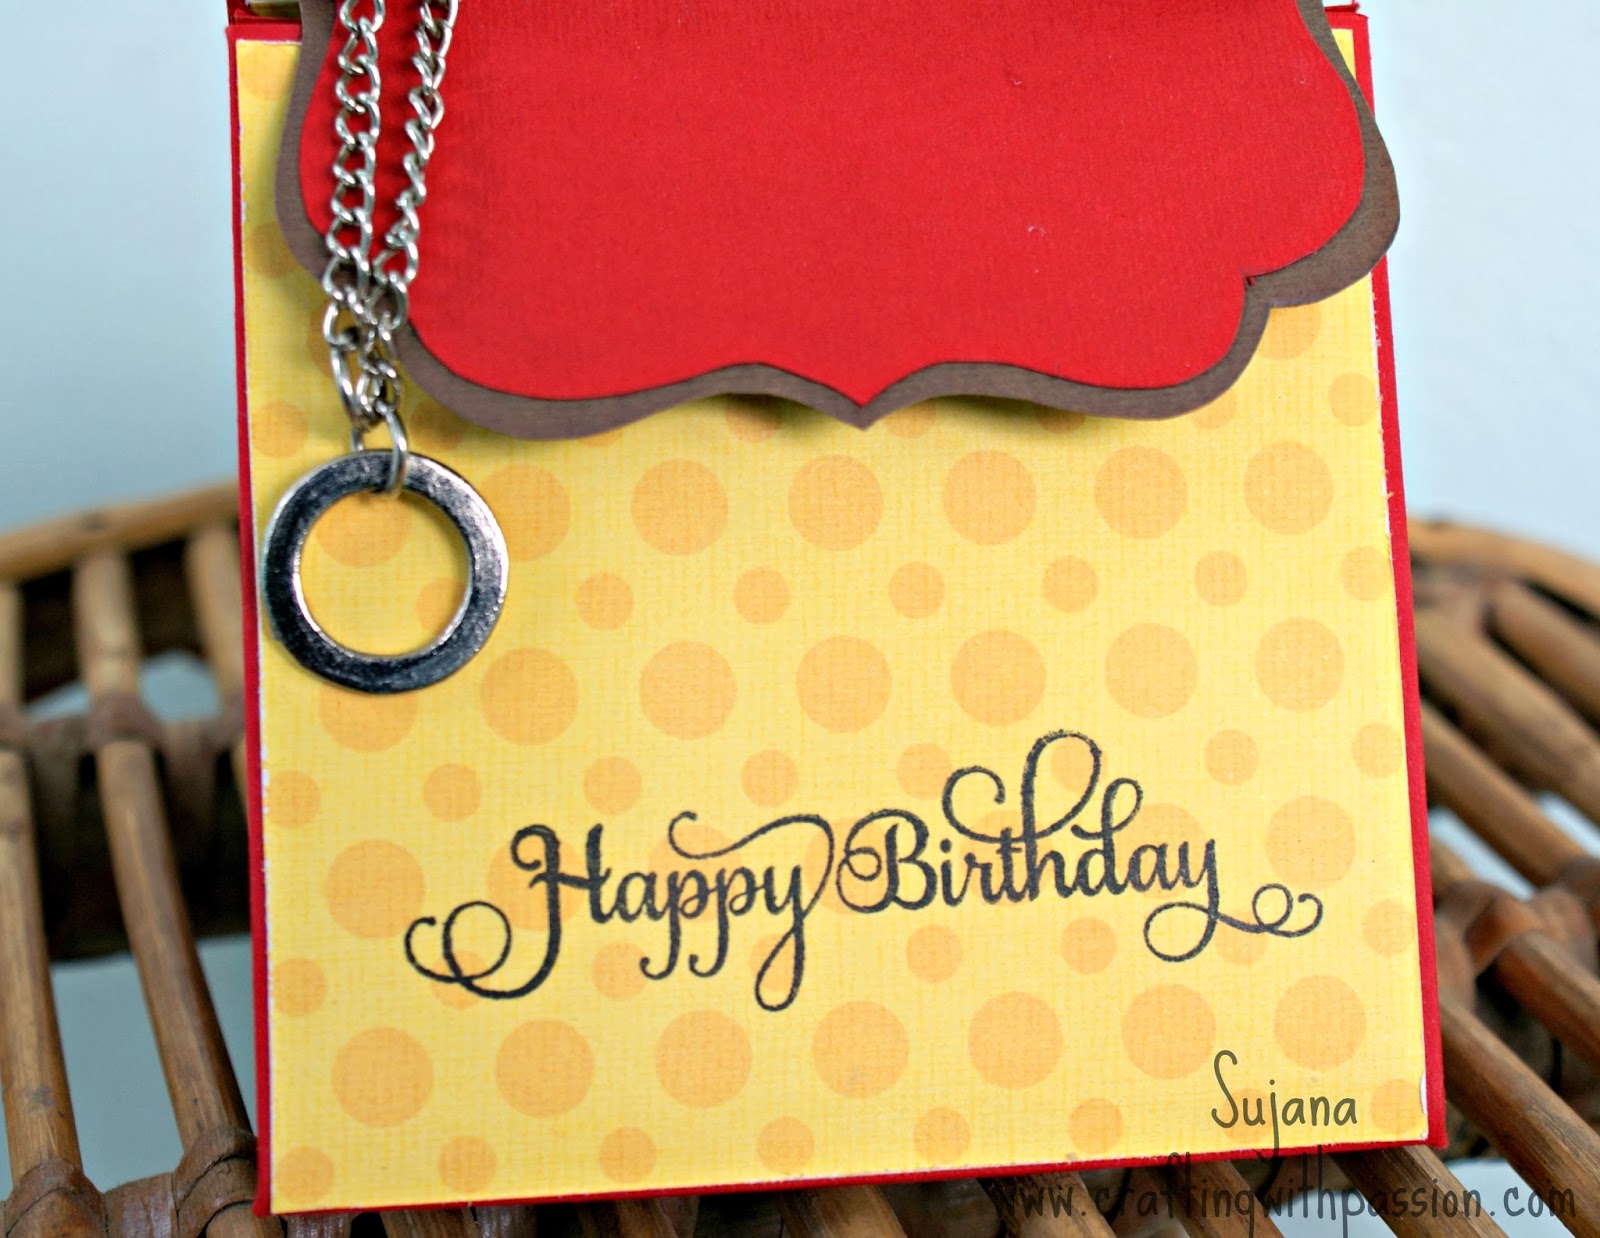
Thanks a lot for your generous comments on my double trishutter card.Today am posting another first for me, a handbag shaped explosion box. Hope u like it
Add caption
I have attached the handle with brads. Now the charm u see here is from my lil guy's play things, it is actually 2 different items put together to form a charm like thing. The metal circle is from a broken car & the chain is from a play clock. I loved this addition
Here is a better view. I have used velcro to close the Handbag's lid
Open View
Actually this was much more easy to do as i had only 4 panels to decorate. I have placed a small cake in the centre. Further both photo panels are pockets, it can be used to place tags or gift vochers. U can see one small tag peeping from behind the photo.
Quilled Roses on top of cake
Some masking with the sentiments, its actually a 2 liner